Looking to expand your knowledge on fences? Look no further than the blog “fencedude.com.” This comprehensive website covers everything you need to know about fences, including different types, sizes, shapes, and materials. Whether you’re interested in wooden fences, chain-link fences, vinyl fences, or metal fences, this blog has got you covered. The blog dives into the benefits and considerations of each type, discussing durability, maintenance requirements, and aesthetic appeal. It also provides insights on which fence types are best for specific purposes, such as enhancing privacy or adding decorative elements to a property. With the aim of educating readers and offering practical advice, this blog is the ultimate resource for all things related to fences.
How to Properly Stain and Seal Your Wooden Fence
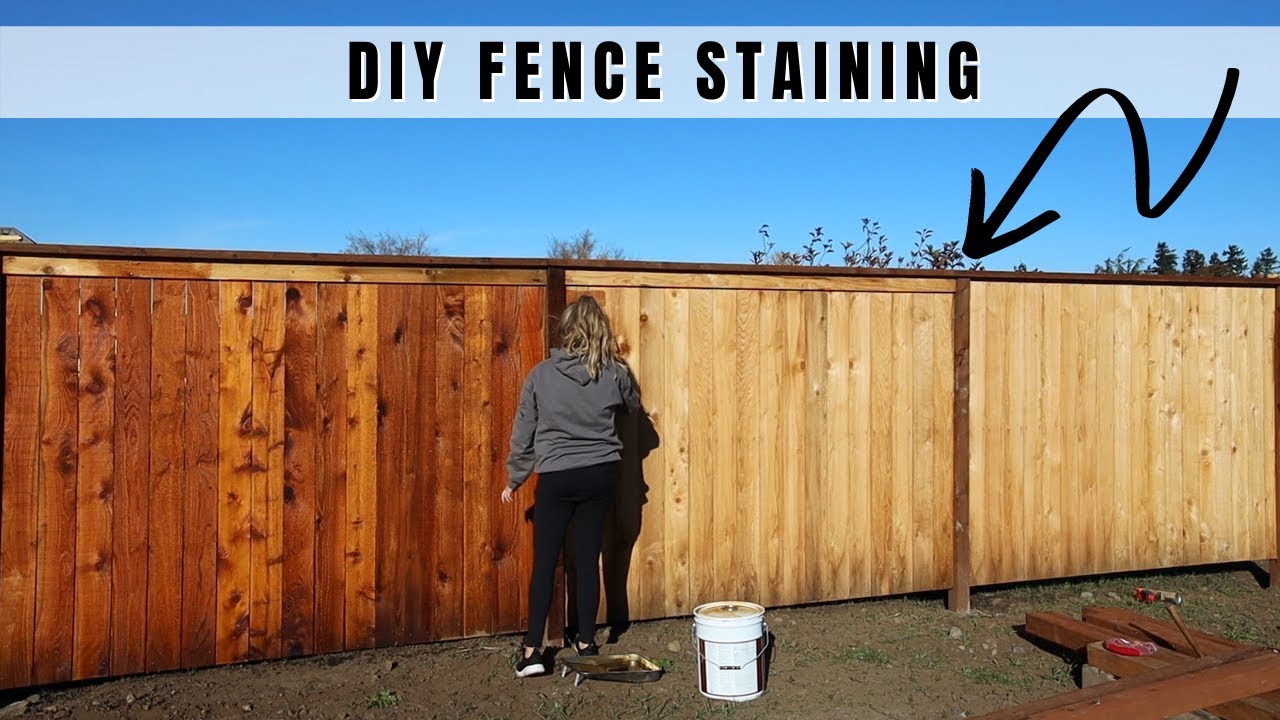
Maintaining a wooden fence is essential for preserving its lifespan and enhancing its appearance. Staining and sealing your fence can protect it from weather damage, keep it looking fresh, and prevent rotting or warping. In this article, we will guide you through the step-by-step process of staining and sealing your wooden fence, including preparation, application techniques, and maintenance tips.

Preparation
Before you begin staining and sealing your wooden fence, it is crucial to properly prepare the surface. This ensures that the stain and sealant will adhere correctly and provide long-lasting protection.
Inspect the Fence
Start by thoroughly inspecting your fence for any signs of damage, such as loose boards, nails, or rot. Repair any issues before proceeding with the staining and sealing process.
Clean the Fence
Next, clean the fence to remove any dirt, debris, or mildew. You can use a pressure washer or a scrub brush with a mixture of water and mild detergent. Ensure that the fence is completely dry before proceeding to the next step.
Remove Existing Stain or Sealant
If your fence already has an existing stain or sealant, you may need to remove it before applying a new one. Use a stain stripper or sandpaper to remove the old finish. Follow the manufacturer’s instructions for the best results.
Choosing the Right Stain and Sealant
Selecting the appropriate stain and sealant for your wooden fence is crucial for achieving the desired look and providing adequate protection. Consider the following factors when choosing a product:
Consider the Wood Type
Different wood species require different types of stain and sealant. For example, cedar and redwood fences may benefit from a clear or semi-transparent stain to enhance their natural beauty, while pressure-treated pine fences may require a solid-color stain for added protection.
Determine the Desired Look
Think about the aesthetic you want to achieve with your fence. Do you prefer a natural wood look or a specific color? Stains and sealants come in a variety of shades, from light neutrals to rich tones, allowing you to customize the appearance of your fence.
Select a Stain and Sealant Product
Once you have considered the wood type and desired look, choose a stain and sealant product that meets your requirements. Consult with a local home improvement store or professional to find the best option for your specific fence.
Gathering the Necessary Tools and Materials
Before you begin staining and sealing your wooden fence, gather all the necessary tools and materials to ensure a smooth process. Here is a list of items you may need:
Protective Gear
Wear appropriate protective gear, such as gloves, safety goggles, and a mask, to protect yourself from chemicals and fumes.
Stir Stick and Paint Tray
Use a stir stick and a paint tray to mix and dispense the stain and sealant.
Brushes and Applicators
Choose high-quality brushes or applicators specifically designed for stain and sealant application. Consider using both a brush and a sprayer for optimal coverage.
Drop Cloths or Tarps
Place drop cloths or tarps on the ground to catch any drips or spills during the staining and sealing process.
Sandpaper or Sanding Block
Keep sandpaper or a sanding block on hand to smooth any rough spots on the fence before applying the stain.
Cleaner and/or Brightener
Use a fence cleaner or brightener to remove any remaining stains, mold, or mildew before staining and sealing.
Painter’s Tape
If there are any areas, such as gate hardware or plants, that you want to protect from staining, use painter’s tape to cover them.
Plastic Wraps or Covers
If you are staining a fence near vegetation or other delicate surfaces, use plastic wraps or covers to prevent overspray.
Clean Rags or Towels
Have clean rags or towels available for wiping off any excess stain or sealant during the application process.
White Spirit or Mineral Spirits
White spirit or mineral spirits are useful for cleaning brushes and removing any stain or sealant residue.
Preparing the Fence for Staining and Sealing
Once you have gathered all the necessary tools and materials, you need to prepare the fence for staining and sealing. Follow these steps:
Cover Surrounding Areas
Before you start staining, cover any nearby plants, grass, or surfaces that you want to protect from overspray or drips. Use drop cloths, plastic wraps, or covers to prevent any unwanted staining.
Sand the Surface
If your fence has any rough areas or imperfections, lightly sand them with sandpaper or a sanding block. This will create a smooth surface for better stain absorption.
Clean the Surface
Before applying the stain, clean the fence surface with a fence cleaner or brightener. This will remove any remaining dirt, mildew, or stains and ensure better adhesion of the stain and sealant.

Applying the Stain
Now that your wooden fence is prepared for staining, it’s time to apply the stain. Follow these tips for a successful application:
Begin with a Test Area
Before staining the entire fence, it is recommended to test the stain on a small, inconspicuous area. This will allow you to assess the color and ensure it meets your expectations.
Choose the Right Weather Conditions
Check the weather forecast and choose a day with mild temperatures and low humidity. Avoid staining your fence on extremely hot or humid days, as it may affect the drying process.
Start from the Top to Bottom
When applying the stain, start from the top of the fence and work your way down. This will prevent any drips or streaks on areas already stained.
Apply in Small Sections
Work in small sections, applying the stain evenly with a brush or applicator. Ensure that each section is fully coated before moving on to the next.
Use Even Strokes
Apply the stain in smooth and even strokes, following the grain of the wood. This will create a uniform finish and prevent any lap marks or uneven coloring.
Blend Overlap Areas
To avoid noticeable lines from overlapping sections, lightly feather or blend the stain into previously stained areas. This will create a seamless finish.
Avoid Over-application
It is important not to over-apply the stain, as this can lead to a sticky or blotchy finish. Follow the manufacturer’s instructions regarding the recommended coverage rate.
Sealing the Wood
Once you have applied the stain and allowed it to dry, it is time to seal the wood. Sealing your fence adds an extra layer of protection and enhances the longevity of the stain. Follow these steps:
Check the Weather Conditions
Ensure that the weather conditions are suitable for applying the sealant. Similar to staining, choose a day with mild temperatures, low humidity, and no rain in the forecast.
Stir the Sealant
Thoroughly stir the sealant before applying it to ensure an even distribution of the protective agents.
Apply in Thin Coats
Using a brush or applicator, apply the sealant in thin and even coats. This will minimize the risk of drips and ensure proper absorption into the wood fibers.
Allow Proper Drying Time
Follow the manufacturer’s instructions regarding the drying time between coats. It is crucial to allow the sealant to dry completely before applying additional coats or allowing any contact with the fence.
Sand Between Coats if Desired
If you prefer a smoother finish, you can lightly sand the surface between coats of sealant. Use fine-grit sandpaper to remove any imperfections and create a polished appearance.

Cleaning Up
After completing the staining and sealing process, it is important to clean up properly to maintain your tools and minimize any environmental impact. Follow these steps:
Dispose of Waste Properly
Dispose of any excess stain, sealant, or debris responsibly according to local regulations. Avoid pouring these materials into drains or onto the ground.
Clean Tools and Brushes
Thoroughly clean your brushes, applicators, and other tools using white spirit or mineral spirits. Follow the manufacturer’s instructions for proper disposal of cleaning agents.
Maintenance Tips
Proper maintenance is crucial for the long-term durability and appearance of a wooden fence. Here are some maintenance tips to keep your stained and sealed fence in top condition:
Keep the Fence Clean
Regularly clean your fence using a mild detergent and water solution to remove dirt, dust, and other debris. This will help prevent the growth of mold or mildew.
Inspect Regularly
Periodically inspect your fence for any signs of damage, such as loose boards, rot, or mold. Address any issues promptly to prevent further damage and ensure the longevity of your fence.
Reapply Stain and Sealant as Needed
Depending on the environmental conditions and wear, your fence may require reapplication of stain and sealant every few years. Keep an eye on the color and condition of the wood, and follow the manufacturer’s recommendations for maintenance.
Protect from Extreme Weather
If your fence is exposed to harsh weather conditions, such as intense sunlight or heavy rain, consider applying an additional coat of sealant for added protection.

Common Mistakes to Avoid
To ensure a successful staining and sealing process, avoid the following common mistakes:
Not Preparing the Fence Properly
Failure to adequately prepare the fence by inspecting, cleaning, and removing any existing stain or sealant can result in an uneven finish and reduced durability.
Over-applying Stain or Sealant
Applying too much stain or sealant can lead to a sticky or blotchy appearance, and it may not fully penetrate the wood. Follow the manufacturer’s instructions regarding the recommended coverage.
Not Checking Weather Conditions
Applying stain or sealant in unfavorable weather conditions, such as high humidity or rain, can negatively impact the drying process and result in an uneven finish.
Skipping Maintenance
Regular maintenance is essential for the longevity of your stained and sealed fence. Neglecting to clean, inspect, and reapply stain and sealant as needed can lead to premature deterioration and the need for costly repairs.
Frequently Asked Questions
To address some common questions about staining and sealing wooden fences, here are ten frequently asked questions and their answers:
| Question | Answer |
|---|---|
| How often do I need to stain and seal my wooden fence? | The frequency of staining and sealing can vary depending on factors such as weather exposure and wear. As a general guideline, consider reapplying stain and sealant every 2-3 years. |
| Can I stain and seal a fence in direct sunlight? | It is best to avoid staining and sealing a fence in direct sunlight, as the heat can cause the stain and sealant to dry too quickly and result in an uneven finish. Choose a day with mild temperatures and work in the shade if possible. |
| Can I stain and seal a fence that has been previously painted? | In most cases, it is not recommended to stain and seal a fence that has been previously painted. The paint may prevent proper absorption of the stain and sealant, leading to a less effective finish. Consult with a professional for the best course of action. |
| What is the best time of the year to stain and seal a fence? | The best time to stain and seal a fence is during mild weather conditions with low humidity and no rain in the forecast. Spring and fall are often suitable seasons for this task. |
| How long does it take for the stain and sealant to dry? | The drying time for stain and sealant can vary depending on the product and weather conditions. Generally, it takes 24-48 hours for the initial drying. However, it may take longer for the sealant to cure completely. Follow the manufacturer’s instructions for accurate drying times. |
| Can I use a pressure washer to clean my wooden fence before staining? | Yes, a pressure washer can be used to clean your fence before staining. However, use caution and follow the manufacturer’s guidelines to prevent damage to the wood. Allow the fence to dry completely before proceeding with staining. |
| Do I need to sand the fence before staining? | Sanding the fence before staining is not always necessary unless there are rough spots or imperfections. However, lightly sanding the surface can help create a smoother finish and improve stain absorption. |
| Is it necessary to wear protective gear when staining and sealing a fence? | Yes, wearing protective gear, such as gloves, safety goggles, and a mask, is essential when working with stain and sealant. These products contain chemicals that may irritate the skin or eyes and can be harmful if inhaled. |
| What if it rains after I apply the stain? | If it starts raining within a few hours of applying the stain, it may affect the drying process and result in an uneven finish. Keep an eye on the weather forecast and try to choose a dry day for staining and sealing your fence. |
| Can I use leftover stain and sealant from a previous project on my fence? | It is generally not recommended to use leftover stain and sealant from a previous project on your fence, as the color and formulation may not match. It is best to use fresh stain and sealant specifically chosen for your fence. |
With these tips, you are now equipped to properly stain and seal your wooden fence. Remember to follow the steps for preparation, choose the right stain, and apply it correctly and evenly. Regular maintenance will ensure that your fence remains durable, attractive, and protected for years to come.
